How to Make Chicken Katsu with Panko Perfection
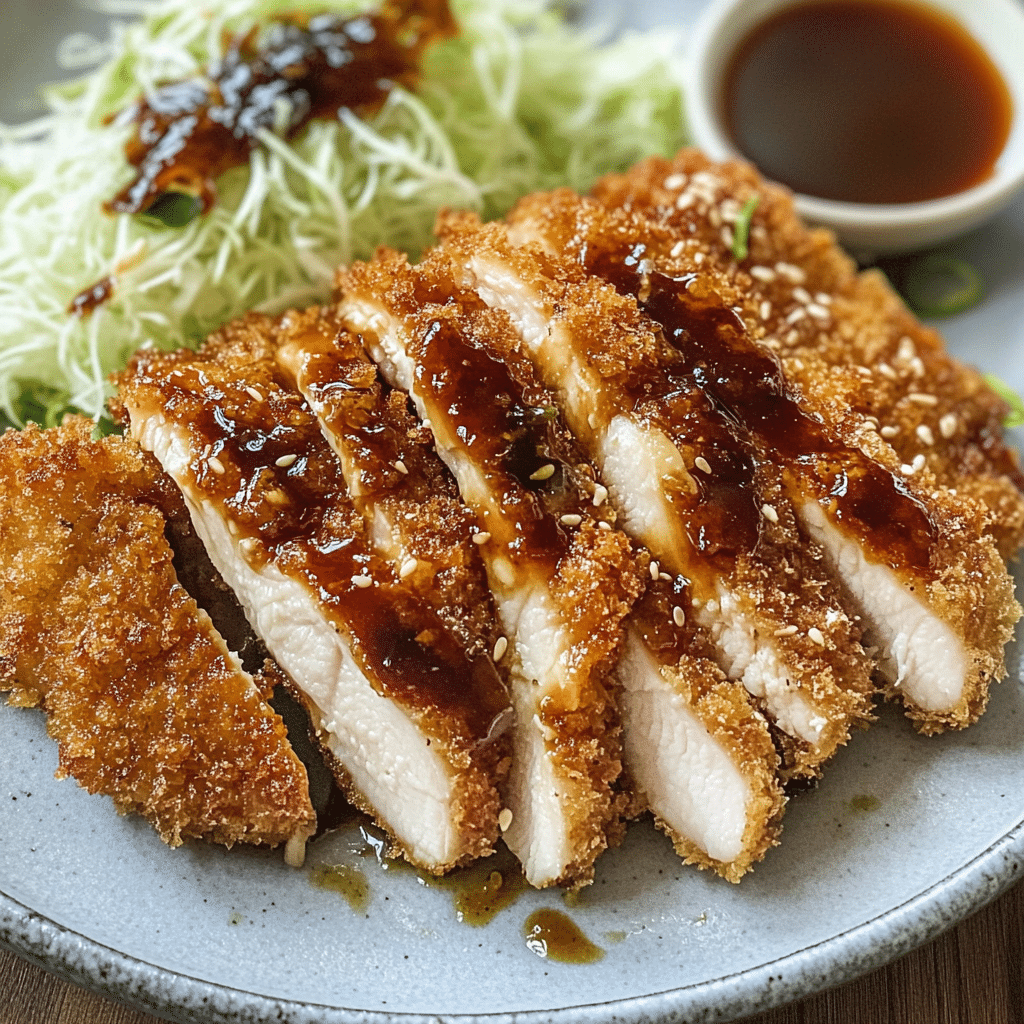
If you’re craving a crispy, golden delight that balances crunch with tender goodness, then this Chicken Katsu with Panko Perfection recipe is exactly what you need. This dish boasts a perfectly breaded chicken cutlet using panko breadcrumbs, delivering an irresistible texture that’s light yet satisfyingly crunchy. Whether you’re making a quick dinner or impressing guests, mastering this recipe means enjoying a delicious meal every single time.
Why You’ll Love This Recipe
- Ultimate Crunch: The use of panko breadcrumbs ensures a lighter, crispier coating that stays crunchy even after frying.
- Easy to Make: Simple ingredients and straightforward steps make this recipe perfect for cooks of all skill levels.
- Tender Inside: The chicken remains juicy and tender, creating the perfect contrast to the crunchy exterior.
- Versatile Dish: Serve it as a main course, in sandwiches, or sliced over rice for a variety of meal options.
- Crowd-Pleaser: A universally loved dish that’s sure to impress family and friends alike.
Ingredients You’ll Need
The magic of Chicken Katsu with Panko Perfection lies in its simple yet crucial ingredients. Each component plays a vital role in building the flavor, texture, and color that define the dish.
- Chicken breasts: Choose boneless, skinless for even cooking and easy breading.
- Flour: Helps the egg wash stick, forming the first layer of coating.
- Eggs: Beats the chicken in an egg wash to bind the panko crumbs securely.
- Panko breadcrumbs: These Japanese-style breadcrumbs create the signature light, crispy crust.
- Salt and pepper: Basic seasoning to enhance the chicken’s natural flavors.
- Vegetable oil: Neutral oil ideal for frying at the right temperature to achieve golden perfection.
Variations for Chicken Katsu with Panko Perfection
One of the best parts of cooking Chicken Katsu with Panko Perfection is how flexible it can be. Feel free to mix things up to suit your preferences, dietary needs, or simply to explore new tastes.
- Spiced Katsu: Add paprika, garlic powder, or cayenne to the flour or panko for a subtle heat and extra flavor kick.
- Gluten-Free Version: Use gluten-free flour and panko to accommodate dietary restrictions without sacrificing texture.
- Chicken Thighs: Swap breasts for boneless thighs for a juicier, more flavorful result.
- Baked Option: For a lighter version, bake the breaded chicken in the oven instead of frying.
- Vegetarian Substitute: Use firm tofu or eggplant slices breaded the same way for a delicious plant-based alternative.

How to Make Chicken Katsu with Panko Perfection
Step 1: Prepare the Chicken
Start by trimming any excess fat from the chicken breasts and gently pounding them to an even thickness, around 1/2 inch, to ensure quick and uniform cooking.
Step 2: Set Up Your Breading Station
Arrange three shallow dishes: one with flour seasoned lightly with salt and pepper, one with beaten eggs, and one with panko breadcrumbs. This setup makes the breading process efficient and mess-free.
Step 3: Coat the Chicken
Dredge each piece first in the flour, shaking off the excess, then dip it in the egg wash, and finally press firmly into the panko until evenly coated. This triple-step approach ensures the panko adheres perfectly for that signature crunch.
Step 4: Heat the Oil
Pour vegetable oil into a deep skillet or frying pan, heating it to about 350°F (175°C). Maintaining the right temperature helps cook the chicken through while achieving a golden crust.
Step 5: Fry the Chicken
Carefully place the breaded chicken into the hot oil, cooking for about 3-4 minutes per side or until the crust turns golden brown and the internal temperature reaches 165°F (74°C).
Step 6: Drain and Rest
Transfer the fried chicken to a wire rack or paper towels to drain excess oil and let it rest for a few minutes. This step keeps the crust crispy while the juices settle inside.
Pro Tips for Making Chicken Katsu with Panko Perfection
- Pat chicken dry: Removing moisture before breading helps the coating stick better and fry crispier.
- Don’t overcrowd the pan: Fry in batches to maintain oil temperature and ensure even cooking.
- Use fresh panko: Old breadcrumbs can become stale and lose their crunch.
- Maintain oil temperature: Use a thermometer to avoid greasy or burnt crusts.
- Rest before slicing: Letting the chicken rest allows juices to redistribute, keeping it juicy.
How to Serve Chicken Katsu with Panko Perfection
Garnishes
Freshly chopped parsley or thinly sliced green onions add a pop of color and freshness to balance the rich flavors of the chicken. A drizzle of tonkatsu sauce or a squeeze of lemon can also brighten the dish.
Side Dishes
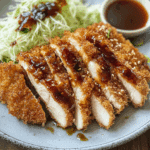
Serve your Chicken Katsu with steamed white rice, shredded cabbage, or a crisp cucumber salad to complement the crunchy texture and keep the meal balanced and refreshing.
Creative Ways to Present
Try slicing the Chicken Katsu into strips and serving over a bed of rice topped with fried eggs for a satisfying donburi bowl, or stuff it inside a soft sandwich bun with lettuce and mayo for a handheld treat.
Make Ahead and Storage
Storing Leftovers
Store leftover chicken katsu in an airtight container in the refrigerator for up to 3 days, keeping it separate from saucy sides to preserve crispness.
Freezing
You can freeze cooked chicken katsu by wrapping pieces individually in plastic wrap and placing them in a freezer bag for up to one month.
Reheating
Reheat in the oven or air fryer at 350°F (175°C) for 5-7 minutes to retain the crispiness and avoid sogginess often caused by microwaving.
FAQs
What is the difference between panko and regular breadcrumbs?
Panko breadcrumbs are larger and flakier than regular breadcrumbs, producing a lighter and crunchier texture when fried, which is essential for authentic chicken katsu.
Can I use chicken thighs instead of chicken breasts?
Yes, boneless chicken thighs can be used for a juicier and more flavorful katsu, though they may require slightly longer cooking times.
Is it possible to make Chicken Katsu with Panko Perfection gluten-free?
Absolutely, substitute regular flour and panko breadcrumbs with gluten-free alternatives to keep the dish safe for gluten-sensitive diets while maintaining texture.
How do I make sure the chicken inside is cooked but the crust doesn’t burn?
Maintain oil temperature around 350°F and cook in manageable batches, flipping only once to allow even cooking without over-browning the crust.
Can I bake Chicken Katsu with Panko Perfection instead of frying?
Yes, baking is a healthier option—place the breaded chicken on a greased baking sheet and bake at 400°F (200°C) for 15-20 minutes until golden and cooked through, flipping halfway.
Final Thoughts
Whether you’re a seasoned chef or a home cook looking for a new favorite, mastering Chicken Katsu with Panko Perfection is sure to delight your taste buds and impress your plate. This recipe delivers crispy, golden exterior and juicy interiors every time, making it a go-to meal that’s both satisfying and fun to prepare. Don’t wait—grab your ingredients and start cooking your very own Chicken Katsu with Panko Perfection today!
Related Posts
- Why Spicy Cheese Ramen Is a Must-Try Delight
- Quick & Easy Chicken Ramen Stir Fry Recipe
- How to Make Garlic Butter Ramen Noodles Fast
Chicken Katsu with Panko Perfection
Chicken Katsu with Panko Perfection is a delicious Japanese-style breaded chicken cutlet recipe featuring a light, crispy panko breadcrumb coating and tender, juicy chicken inside. Perfect for a quick dinner or impressing guests, this easy-to-make dish balances crunch and flavor with simple ingredients and straightforward steps.
- Prep Time: 15 minutes
- Cook Time: 10 minutes
- Total Time: 25 minutes
- Yield: 2 servings 1x
- Category: Appetizers
- Method: Frying
- Cuisine: Japanese
- Diet: Gluten Free (with gluten-free substitutions)
Ingredients
Chicken
- 2 boneless, skinless chicken breasts
Coating
- 1 cup all-purpose flour (or gluten-free flour for gluten-free option)
- 2 large eggs, beaten
- 1 1/2 cups panko breadcrumbs (use gluten-free panko if needed)
- Salt, to taste
- Black pepper, to taste
Frying
- Vegetable oil, for frying (enough to fill pan about 1 inch deep)
Instructions
- Prepare the Chicken: Trim any excess fat from the chicken breasts and gently pound them with a meat mallet or rolling pin to an even thickness of about 1/2 inch to ensure quick and uniform cooking.
- Set Up Your Breading Station: Arrange three shallow dishes side by side: one with flour seasoned lightly with salt and pepper, one with beaten eggs, and one with panko breadcrumbs. This setup makes breading efficient and neat.
- Coat the Chicken: Dredge each chicken breast first in the flour, shaking off any excess. Then dip into the beaten eggs, allowing excess to drip off, and finally press firmly into the panko breadcrumbs until evenly coated on all sides for a crunchy crust.
- Heat the Oil: Pour vegetable oil into a deep skillet or frying pan to a depth of about 1 inch. Heat the oil to 350°F (175°C) using a thermometer to maintain consistent temperature for perfect frying.
- Fry the Chicken: Carefully place the breaded chicken pieces into the hot oil. Fry for 3-4 minutes per side, or until the coating is golden brown and the internal temperature reaches 165°F (74°C). Avoid overcrowding the pan to maintain oil temperature.
- Drain and Rest: Remove the fried chicken from oil and place on a wire rack or paper towels to drain excess oil. Let rest for a few minutes to keep the crust crispy and allow juices to redistribute inside.
Notes
- Pat chicken dry before breading to help coating stick better and achieve crispiness.
- Fry in batches to prevent oil temperature drop and ensure even cooking.
- Use fresh panko breadcrumbs for the best crisp texture.
- Maintain oil temperature with a thermometer to avoid greasy or burnt crust.
- Let chicken rest after frying to keep it juicy before slicing.
Nutrition
- Serving Size: 1 chicken cutlet (approx. 150g)
- Calories: 350
- Sugar: 0g
- Sodium: 400mg
- Fat: 18g
- Saturated Fat: 3g
- Unsaturated Fat: 12g
- Trans Fat: 0g
- Carbohydrates: 20g
- Fiber: 1g
- Protein: 30g
- Cholesterol: 100mg
Keywords: Chicken Katsu, Panko Chicken, Japanese Fried Chicken, Crispy Chicken Cutlet, Gluten-Free Chicken Katsu