Halloween Marble Cake
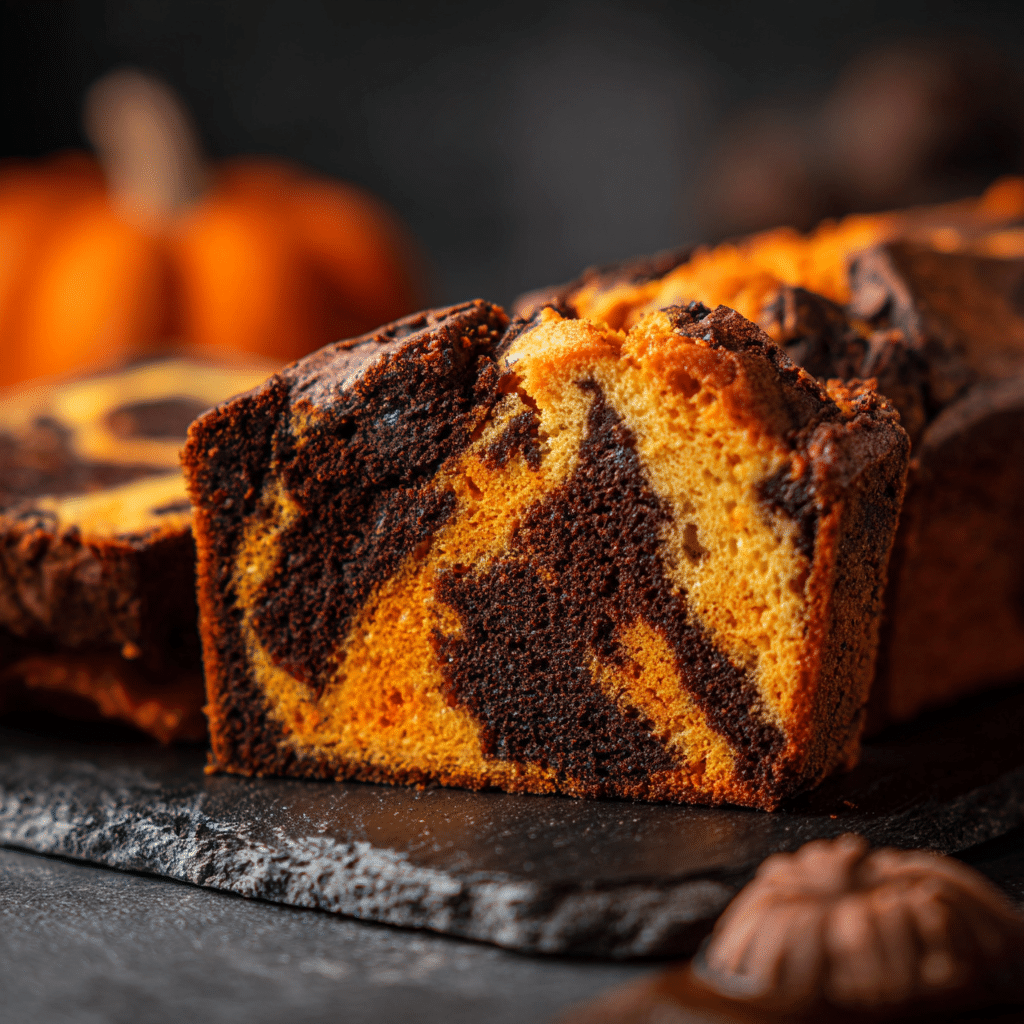
If you’re looking for a delightfully spooky treat to wow your guests this season, these 5 spooky Halloween Marble Cake recipes are an absolute must-try. Packed with beautiful swirls of chocolate and vanilla that mimic mysterious shadows, each Halloween Marble Cake offers a perfect blend of flavor and festive fun. Easy to bake and even easier to decorate, these cakes will bring a hauntingly delicious vibe to your Halloween celebration.
Why You’ll Love This Recipe
- Effortless Elegance: Achieve a stunning marbled effect with simple techniques that impress every time.
- Flavor Harmony: Perfectly balanced chocolate and vanilla tastes that satisfy all palates.
- Festive and Fun: Customizable design options let you get creative with spooky decorations.
- Family Friendly: A kid-approved recipe that’s a great activity and treat for any age.
- Great for Gifting: Beautiful appearance makes it a thoughtful homemade gift during Halloween season.
Ingredients You’ll Need
The beauty of these Halloween Marble Cake recipes lies in their simplicity. Using common baking staples ensures the perfect texture and flavor, while subtle additions bring out the seasonal charm.
- All-purpose Flour: Provides structure and helps create a tender crumb.
- Sugar: Adds sweetness and helps the cake brown to perfection.
- Butter: Offers richness and moisture for a luscious bite.
- Eggs: Bind ingredients and add lift to the batter.
- Vanilla Extract: Enhances the cake’s natural sweetness and depth.
- Cocoa Powder: Brings rich chocolate flavor and beautiful dark swirls.
- Baking Powder: Helps the cake rise and stay light.
- Milk: Adds moisture and helps create a smooth batter.
- Food Coloring (Optional): For festive Halloween colors like orange, green, or purple swirls.
Variations for Halloween Marble Cake
One of the best things about the Halloween Marble Cake is how easy it is to adapt to your own tastes or dietary needs. Don’t hesitate to get creative with flavors and textures using these ideas.
- Pumpkin Spice Twist: Add pumpkin puree and spices like cinnamon and nutmeg for a seasonal touch.
- Gluten-Free Option: Substitute with a gluten-free flour blend for those with sensitivities.
- Vegan Version: Use flax eggs, plant-based milk, and vegan butter to make it cruelty-free.
- Chocolate Hazelnut Swirl: Mix Nutella or hazelnut spread into the chocolate batter for added indulgence.
- Spooky Colors: Incorporate black food coloring into the chocolate portion for a deeper, more dramatic effect.

How to Make Halloween Marble Cake
Step 1: Prepare Your Batter
Start by creaming softened butter and sugar together until light and fluffy. Add eggs one at a time, mixing well after each addition. Then, alternate adding the dry ingredients (flour and baking powder) with milk, starting and ending with dry ingredients. Stir in vanilla extract to complete the basic batter.
Step 2: Divide and Flavor
Divide the batter evenly into two bowls. In one bowl, sift in cocoa powder and combine thoroughly to make the chocolate portion. If desired, add your chosen food coloring to the vanilla batter or cocoa batter for that vibrant Halloween look.
Step 3: Create the Marble Effect
Grease and flour your cake pan(s). Spoon alternating dollops of vanilla and chocolate batter into the pan. Using a skewer or butter knife, gently swirl through the batter in a figure-eight or circular motion to create the marbled pattern. Be careful not to overmix—distinct swirls are what you want!
Step 4: Bake to Perfection
Bake the batter at 350°F (175°C) for 35-40 minutes, or until a toothpick inserted into the center comes out clean. Let the cake cool in the pan for 10 minutes before transferring to a wire rack to cool completely.
Step 5: Decorate and Enjoy
Once cooled, feel free to decorate with Halloween-themed icing, sprinkles, or edible decorations like candy eyes, spider webs, or colored frosting to complete the spooky presentation.
Pro Tips for Making Halloween Marble Cake
- Room Temperature Ingredients: Use butter and eggs at room temperature for a smooth, even batter.
- Don’t Overmix the Batter: Overworking can toughen the cake, so mix only until just combined.
- Light Swirling: Use gentle arcs to create clear marbling rather than blending the batters too much.
- Check Oven Temperature: Use an oven thermometer to ensure accurate baking and avoid over or underbaking.
- Cool Completely: Allowing the cake to cool fully prevents melting decorations and makes slicing cleaner.
How to Serve Halloween Marble Cake
Garnishes
Dress your Halloween Marble Cake with edible decorations such as crushed Oreo “dirt,” candy pumpkins, or themed sprinkles to amp up the festive feel.
Side Dishes
Pair your cake with seasonal treats like spiced whipped cream, caramel sauce, or a scoop of cinnamon ice cream for extra indulgence.
Creative Ways to Present
Consider serving slices on black or orange plates, placing small plastic spiders on the cake, or presenting cupcakes with marbled designs in Halloween-themed liners for a crowd-pleasing display.
Make Ahead and Storage
Storing Leftovers
Store leftover Halloween Marble Cake covered tightly with plastic wrap or in an airtight container at room temperature for up to 3 days to maintain freshness and moisture.
Freezing
Wrap the cake tightly in plastic wrap and foil and freeze for up to 2 months. Thaw in the refrigerator overnight before serving for the best texture.
Reheating
Warm slices gently in the microwave for 15-20 seconds or in a low oven (300°F) wrapped in foil to revive moistness without drying out the cake.
FAQs
Can I make Halloween Marble Cake gluten-free?
Absolutely! By swapping regular flour with a gluten-free all-purpose blend, you can easily create a gluten-free Halloween Marble Cake without sacrificing texture.
How do I achieve the best marbled effect?
Alternate spoonfuls of the two batters in the pan and use a skewer or knife with gentle swirling motions to create distinct swirls without blending too much.
What is the best pan to bake this cake in?
A standard 9-inch round cake pan works well, but you can also use bundt pans, loaf pans, or even cupcake tins depending on your presentation preference.
Can I add food coloring to the recipe?
Yes! Adding food coloring to the vanilla or chocolate batter will give your Halloween Marble Cake vibrant orange, purple, or green swirls perfect for a festive look.
How long does this cake stay fresh?
When stored properly in an airtight container at room temperature, Halloween Marble Cake stays fresh for up to three days, making it perfect to bake a day ahead for your party.
Final Thoughts
There’s something truly magical about the swirl of colors and flavors in a Halloween Marble Cake that turns every slice into a celebration of the season. Whether you stick to the classic versions or customize with spooky twists, these recipes guarantee a delightful and memorable treat for your Halloween festivities. Go ahead and bake one today—you won’t regret the delicious fun!
Related Posts
PrintHalloween Marble Cake

This Halloween Marble Cake features delightful swirls of chocolate and vanilla, creating a spooky and festive treat perfect for seasonal celebrations. Easy to bake with balanced flavors and customizable decorations, it’s a family-friendly recipe ideal for sharing or gifting during Halloween.
- Prep Time: 20 minutes
- Cook Time: 35-40 minutes
- Total Time: 55-60 minutes
- Yield: 1 9-inch round cake 1x
- Category: Desserts
- Method: Baking
- Cuisine: American
- Diet: Can be gluten-free or vegan with substitutions
Ingredients
Main Ingredients
- 2 cups all-purpose flour
- 1 1/2 cups sugar
- 1 cup unsalted butter, softened
- 3 large eggs
- 2 teaspoons vanilla extract
- 1/4 cup cocoa powder
- 2 teaspoons baking powder
- 1 cup milk
- Food coloring (optional) – orange, green, purple, or black
Instructions
- Prepare Your Batter: Start by creaming the softened butter and sugar together until light and fluffy. Add eggs one at a time, mixing well after each addition. Alternate adding the dry ingredients (flour and baking powder) with milk, beginning and ending with the dry ingredients. Stir in vanilla extract to complete the basic batter.
- Divide and Flavor: Divide the batter evenly into two bowls. In one bowl, sift in the cocoa powder and mix thoroughly to create the chocolate portion. If desired, add food coloring to either the vanilla or chocolate batter to create vibrant Halloween colors.
- Create the Marble Effect: Grease and flour your cake pan(s). Spoon alternating dollops of vanilla and chocolate batter into the pan. Use a skewer or butter knife to gently swirl the batters in a figure-eight or circular motion to form a marbled pattern. Avoid overmixing to maintain distinct swirls.
- Bake to Perfection: Bake at 350°F (175°C) for 35-40 minutes, or until a toothpick inserted into the center comes out clean. Let the cake cool in the pan for 10 minutes before transferring to a wire rack to cool completely.
- Decorate and Enjoy: Once cooled, decorate with Halloween-themed icing, sprinkles, or edible decorations such as candy eyes, spider webs, or colored frosting to complete the spooky presentation.
Notes
- Use butter and eggs at room temperature for a smooth and even batter.
- Mix the batter only until just combined to avoid toughening the cake.
- Gently swirl the batters to create clear marbling without blending them too much.
- Use an oven thermometer to ensure accurate baking temperature.
- Allow the cake to cool fully before decorating and slicing for best results.
Nutrition
- Serving Size: 1 slice (1/12 of cake)
- Calories: 280
- Sugar: 20g
- Sodium: 150mg
- Fat: 14g
- Saturated Fat: 8g
- Unsaturated Fat: 5g
- Trans Fat: 0g
- Carbohydrates: 34g
- Fiber: 2g
- Protein: 4g
- Cholesterol: 55mg
Keywords: Halloween cake, marble cake, chocolate vanilla cake, spooky dessert, Halloween dessert, festive cake, easy cake recipe