Why Traditional Vanilla Custard Is Everyone’s Favorite
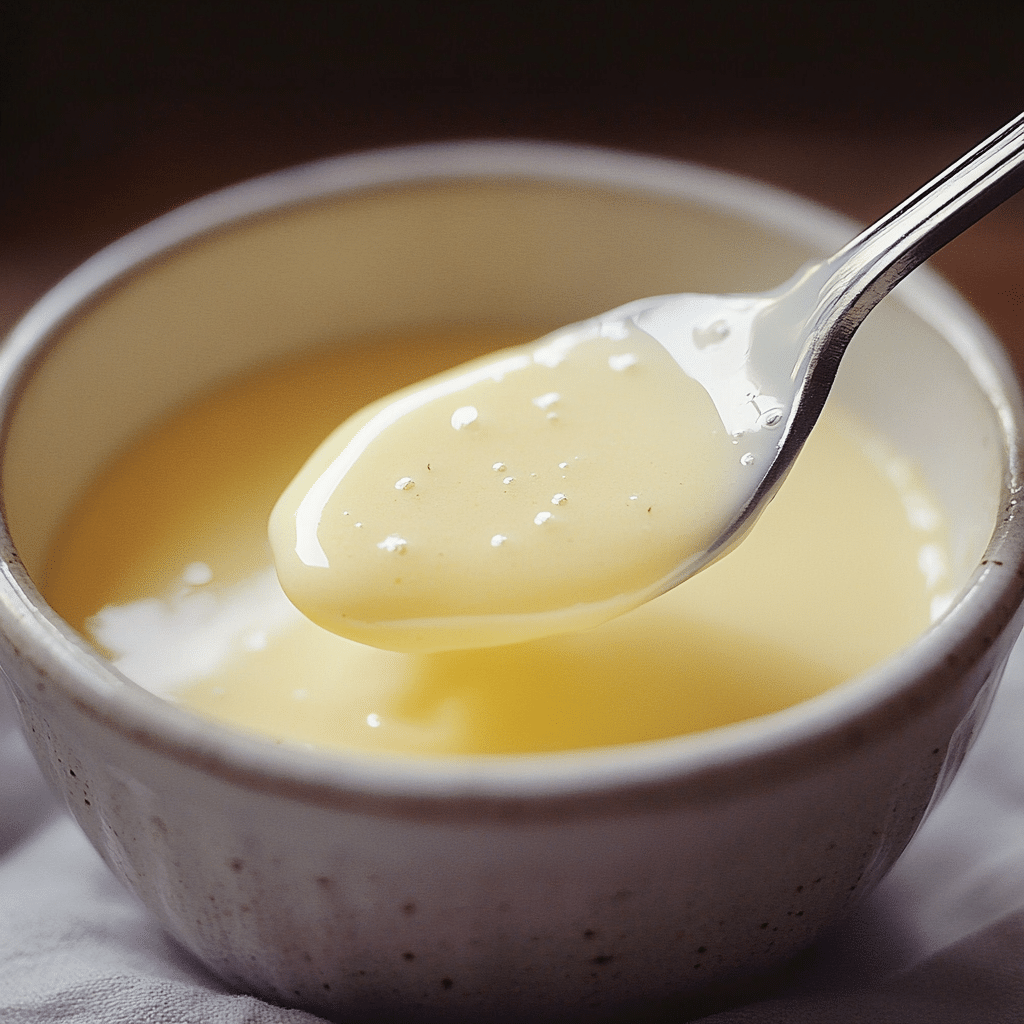
Discover the rich, creamy delight of traditional vanilla custard, a timeless dessert adored by people everywhere for its perfectly smooth texture and nostalgic flavor. This classic treat brings warmth and comfort in every spoonful, making it a beloved favorite for dessert lovers who appreciate simple ingredients transformed into something extraordinary. Whether served warm or chilled, traditional vanilla custard combines the sweetness of vanilla with a luscious creaminess that’s hard to resist.
Why You’ll Love This Recipe
- Pure Comfort Food: Traditional vanilla custard offers a creamy, soothing dessert experience that feels like a warm hug from the inside.
- Simple Ingredients: Made with everyday pantry staples, this recipe brings richness and smoothness without any fuss.
- Versatile Serving Options: Enjoy it on its own, with toppings, or as a base for other desserts like trifles and pies.
- Perfect Balance of Flavors: The natural sweetness and aromatic vanilla work together to create a luscious and satisfying taste.
- Family-Friendly: Loved by kids and adults alike, it’s a classic that can please any crowd.
Ingredients You’ll Need
The beauty of traditional vanilla custard lies in its simplicity. Each ingredient plays a crucial role in crafting its smooth texture, creamy richness, and delicate flavor that lingers beautifully on the palate.
- Whole Milk: Provides the creamy base and smooth texture essential for custard.
- Heavy Cream: Adds richness and depth to make custard decadently silky.
- Egg Yolks: The magic thickener that creates custard’s characteristic velvety consistency.
- Granulated Sugar: Sweetens the custard gently without overpowering the vanilla.
- Vanilla Bean or Extract: Infuses that unmistakable warm, floral vanilla aroma and flavor.
- Salt: Enhances sweetness and balances the custard’s overall flavor.
Variations for Traditional Vanilla Custard
Traditional vanilla custard is wonderfully adaptable, letting you customize it to your taste preferences or dietary needs with ease. Experimenting with these variations can keep this classic recipe exciting and fresh.
- Chocolate Twist: Stir in melted bittersweet chocolate for a decadent chocolate custard variation.
- Dairy-Free Option: Substitute coconut milk or almond milk and use cornstarch instead of egg yolks for a creamy vegan version.
- Citrus Infused: Add a strip of lemon or orange zest to the milk for a refreshing hint of citrus aroma.
- Spiced Version: Incorporate ground cinnamon or nutmeg to add a warm, cozy spice note perfect for colder months.
- Fruit Swirl: Blend in a spoonful of berry puree or mango for a sweet fruity twist.

How to Make Traditional Vanilla Custard
Step 1: Prepare Your Vanilla Infusion
Start by warming the milk and cream gently with the vanilla bean pod or vanilla extract to infuse the milk with the rich, aromatic flavor that defines this custard.
Step 2: Whisk Egg Yolks and Sugar
In a separate bowl, whisk together the egg yolks and granulated sugar until the mixture is pale and slightly thickened, ensuring a smooth base for the custard.
Step 3: Temper the Eggs
Slowly pour the warm vanilla milk into the egg mixture while whisking constantly to avoid curdling, gradually raising the temperature of the eggs gently.
Step 4: Cook the Custard
Return the mixture to the stove and cook over low heat, stirring constantly until it thickens enough to coat the back of a spoon without scrambling the eggs.
Step 5: Strain and Chill
Pour the hot custard through a fine mesh sieve to remove any lumps or cooked egg bits, then cover and chill in the refrigerator to develop its full silken texture.
Pro Tips for Making Traditional Vanilla Custard
- Use Fresh Eggs: Fresh, high-quality eggs yield the best texture and flavor in your custard.
- Low and Slow Cooking: Always cook custard gently over low heat to prevent curdling or scrambling.
- Constant Stirring: Stir continuously to ensure even cooking and a smooth finish.
- Strain Thoroughly: Straining removes any bits of cooked egg and guarantees a silky custard.
- Patience Is Key: Let the custard chill completely; this step helps the texture set perfectly.
How to Serve Traditional Vanilla Custard
Garnishes
Simple garnishes like freshly grated nutmeg, a sprinkle of cinnamon, or a few fresh berries add visual appeal and texture contrasts to your custard.
Side Dishes
Pair the custard with fruit tarts, warm apple slices, or crisp ladyfingers to create a satisfying dessert combination that balances creaminess with crunch.
Creative Ways to Present
Serve it layered in parfait glasses with granola and fruit for a breakfast twist or drizzle caramel sauce on top for an extra indulgent treat.
Make Ahead and Storage
Storing Leftovers
Keep leftover custard covered tightly in the refrigerator for up to three days, ensuring it maintains its creamy texture and fresh flavor.
Freezing
Traditional vanilla custard does not freeze well due to changes in texture after thawing, so it’s best enjoyed fresh or refrigerated.
Reheating
Gently reheat custard over a double boiler or microwave in short bursts, stirring often to prevent overheating or curdling.
FAQs
Can I make traditional vanilla custard without a stove?
While stove-top cooking offers the best control over temperature, you can try using a slow cooker or sous vide method with careful temperature monitoring.
Is traditional vanilla custard gluten-free?
Yes, this custard recipe is naturally gluten-free, making it safe for those with gluten sensitivities.
How long does traditional vanilla custard last in the fridge?
Properly stored in an airtight container, traditional vanilla custard lasts up to three days in the refrigerator.
Can I use vanilla extract instead of vanilla beans?
Absolutely! High-quality vanilla extract works well and is a convenient alternative to vanilla beans.
What causes custard to curdle, and how to avoid it?
Custard curdles when cooked at too high a temperature or left unstirred; always cook gently and stir continuously to maintain smoothness.
Final Thoughts
Traditional vanilla custard is a timeless dessert that never fails to bring comfort and joy with its creamy texture and nostalgic vanilla flavor. Easy to make and endlessly versatile, it’s the perfect recipe to keep in your culinary repertoire for any occasion. Dive into this classic treat and discover why it remains everyone’s favorite time and time again.
Related Posts
- Why Moist Honey Cake with Almonds Is a Must-Try Treat
- Why Peanut Butter M&M’s Cake Is Irresistible
- Why Buttermilk Pie is a Southern Classic
Traditional vanilla custard
Traditional vanilla custard is a rich, creamy dessert known for its smooth texture and nostalgic vanilla flavor. Made from simple pantry ingredients like milk, cream, egg yolks, sugar, and vanilla, it offers a comforting and luscious treat that can be enjoyed warm or chilled. This versatile custard can be served on its own or used as a base for other desserts, appealing to both children and adults alike.
- Prep Time: 10 minutes
- Cook Time: 15 minutes
- Total Time: 2 hours 25 minutes
- Yield: 4 servings 1x
- Category: Dessert
- Method: Stovetop
- Cuisine: Classic
- Diet: Gluten Free
Ingredients
Dairy
- 2 cups whole milk
- 1 cup heavy cream
Eggs and Sweeteners
- 4 large egg yolks
- 2/3 cup granulated sugar
Flavorings
- 1 vanilla bean (split and scraped) or 1 teaspoon vanilla extract
- 1/8 teaspoon salt
Instructions
- Prepare Your Vanilla Infusion: Start by gently warming the whole milk and heavy cream with the split vanilla bean pod and its seeds or vanilla extract over medium-low heat until steaming but not boiling. This infuses the mixture with the warm, aromatic vanilla flavor.
- Whisk Egg Yolks and Sugar: In a separate bowl, whisk together the egg yolks and granulated sugar until the mixture is pale yellow and slightly thickened, forming a smooth, creamy base for the custard.
- Temper the Eggs: Slowly pour the warm vanilla milk mixture into the egg yolk and sugar mixture while whisking constantly to gradually raise the temperature of the eggs and prevent curdling.
- Cook the Custard: Return the combined mixture to a saucepan and cook over low heat, stirring continuously with a wooden spoon or spatula, until the custard thickens enough to coat the back of a spoon. Be careful not to let it boil or scramble the eggs.
- Strain and Chill: Pour the cooked custard through a fine mesh sieve into a clean container to remove any lumps or cooked egg bits. Cover tightly and refrigerate for at least 2 hours or until fully chilled to develop a smooth, silken texture.
Notes
- Use Fresh Eggs: Ensure your eggs are fresh for the best texture and flavor.
- Low and Slow Cooking: Always cook custard gently over low heat to avoid curdling or scrambling.
- Constant Stirring: Stir continuously for even cooking and a smooth finish.
- Strain Thoroughly: Straining guarantees a silky custard by removing any cooked egg bits.
- Patience Is Key: Letting the custard chill completely helps the texture set perfectly.
Nutrition
- Serving Size: 1/4 of recipe
- Calories: 280
- Sugar: 20g
- Sodium: 60mg
- Fat: 18g
- Saturated Fat: 11g
- Unsaturated Fat: 6g
- Trans Fat: 0g
- Carbohydrates: 20g
- Fiber: 0g
- Protein: 5g
- Cholesterol: 220mg
Keywords: vanilla custard, traditional custard, creamy custard, classic dessert, gluten free dessert